International Status Correction Process
Please read ALL instructions and steps thoroughly before starting.
Step 1:
Start the process by completing this form: GFG528 Status Corrected
You will receive an email titled “Status Verification” as confirmation.
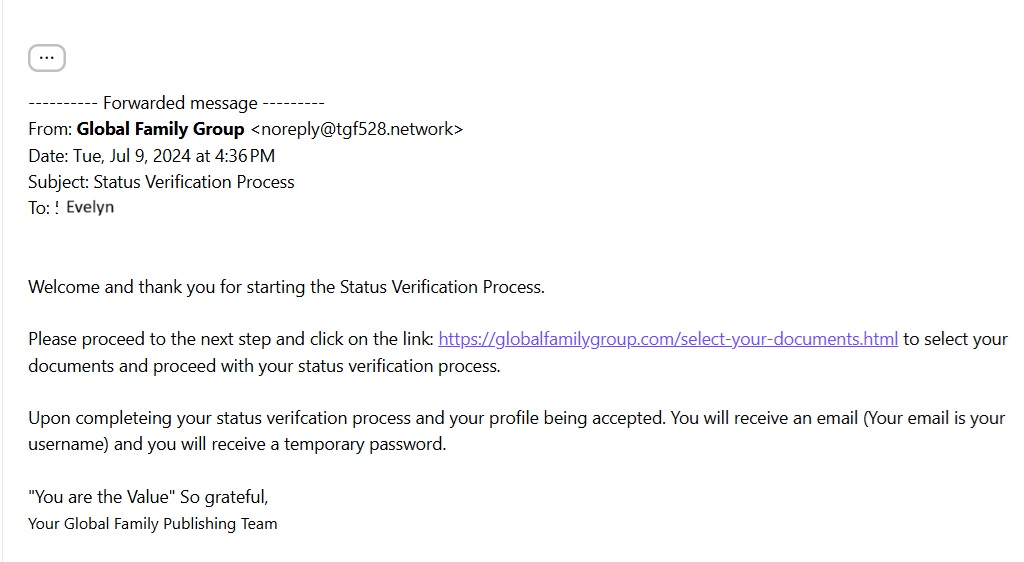
The link in this email will provide further information on how to prepare your documentation correctly.
After that, wait for a second email with login details for your new account – do not log in yet. The email may take some time as they are overwhelmed with applications.
While waiting for the second email, begin preparing all the necessary documentation.
IMPORTANT INFORMATION WHEN COMPLETING THE FORMS:
- a) Do not fill out everything in block letters/capital letters only. Your name in all caps refers to your fictional person.
b) Complete the form ONLY in blue ink.
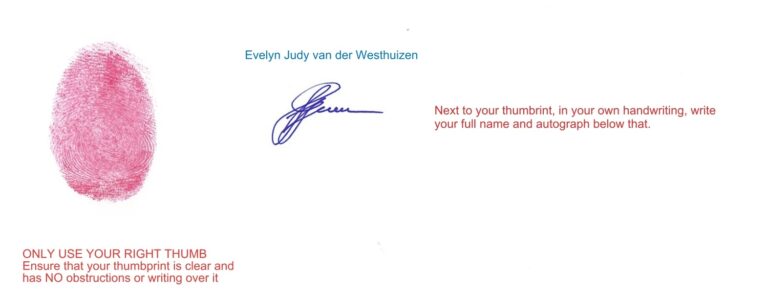
c) Use ONLY your right thumb for the fingerprint, in red ink.
d) The fingerprint MUST touch the signature (autograph).
e) Forms must be completed by hand and not typed on a computer.
For the purposes of this training and to simplify completing the forms, we will use the following fictitious information. However, you must fill in the forms with your information and that of your witnesses:
- Fictitious You Example: Evelyn Judy van der Westhuizen
- Fictitious Witness 1 Example: Leela
- Fictitious Witness 2 Example: Chantal
- Fictitious Witness 3 Example: Prince
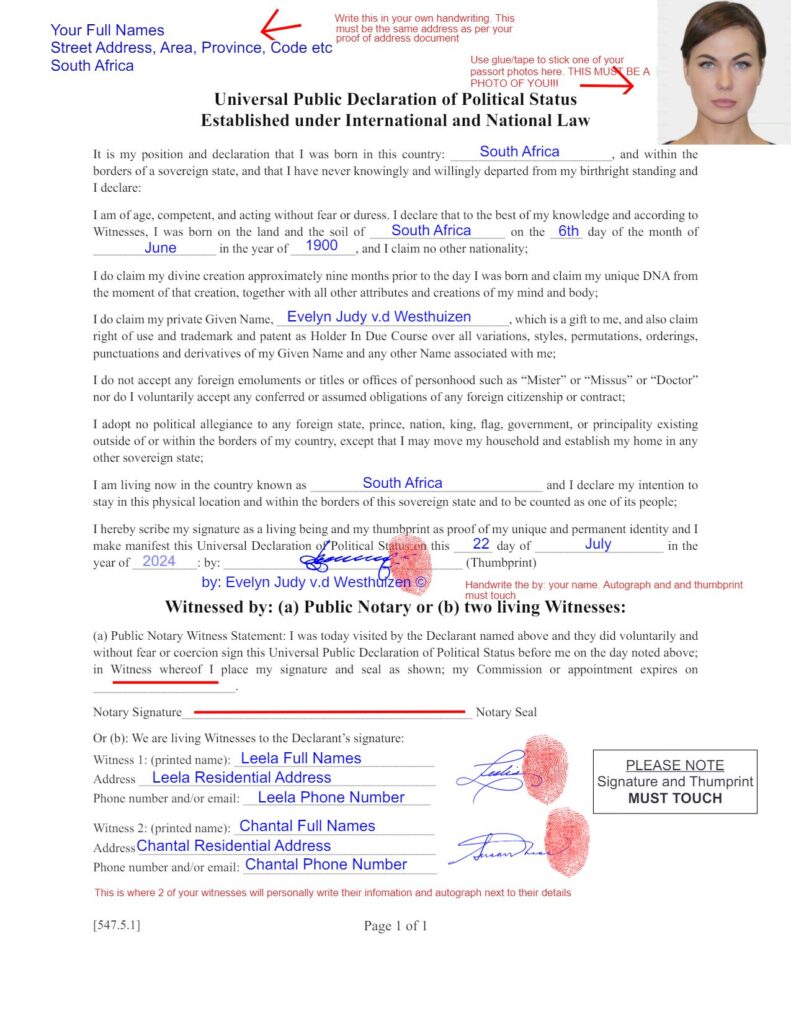
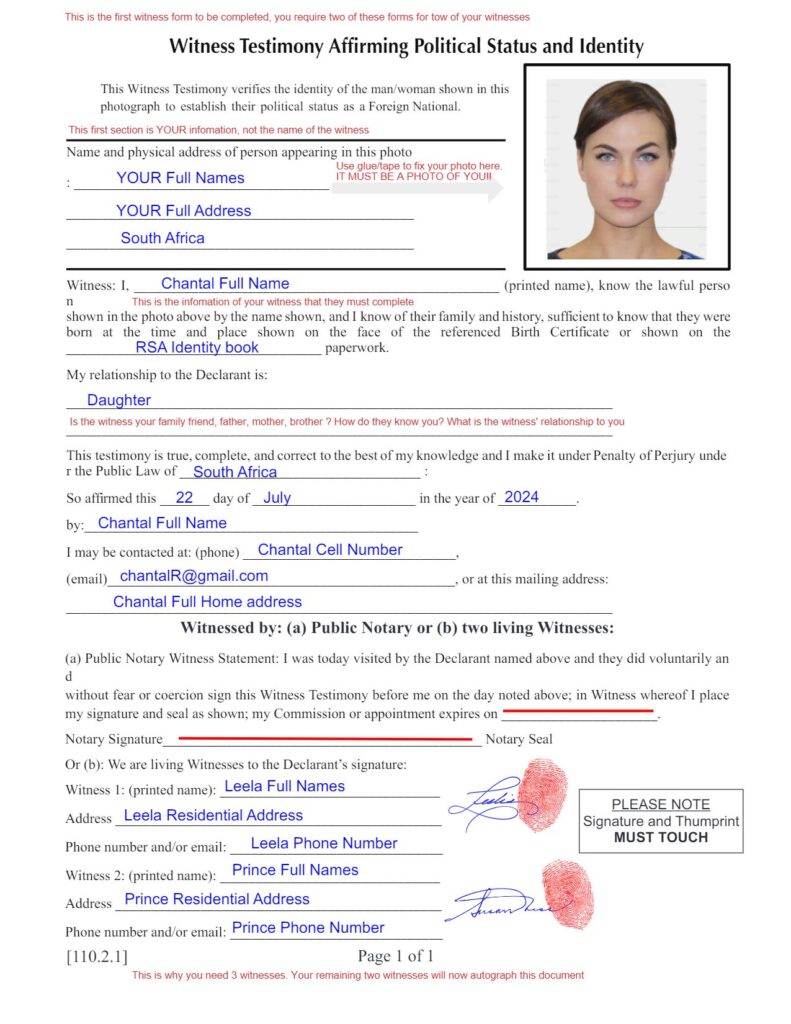
Refer to the attached examples, at the bottom of this page, on how to complete the forms correctly.
You will need the following items:
- 1x UDP form printed on white paper (Universal Public Declaration of Political Status)
- 2x Witness Declaration forms printed on white paper (Witness Testimony Affirming Political Status and Identity)
- 3 individuals to act as witnesses
- Blue pen – complete all documents ONLY in blue ink
- 3x passport-sized photos
- 1x digital passport photo (51mm x 51mm) in JPEG format
- Red ink – you may also use red food coloring applied to cotton wool. Test the ink on plain paper first to ensure the right amount. The fingerprint must be clear.
- Proof of address in PDF format – this can be a cell phone bill, utility bill, or even proof of a bank account.
- ID in PDF format – passport, driver’s license, or the front of your ID card/booklet is acceptable.
- 1x clear thumbprint in red ink on a blank sheet of paper, in PDF format.
Step 2:
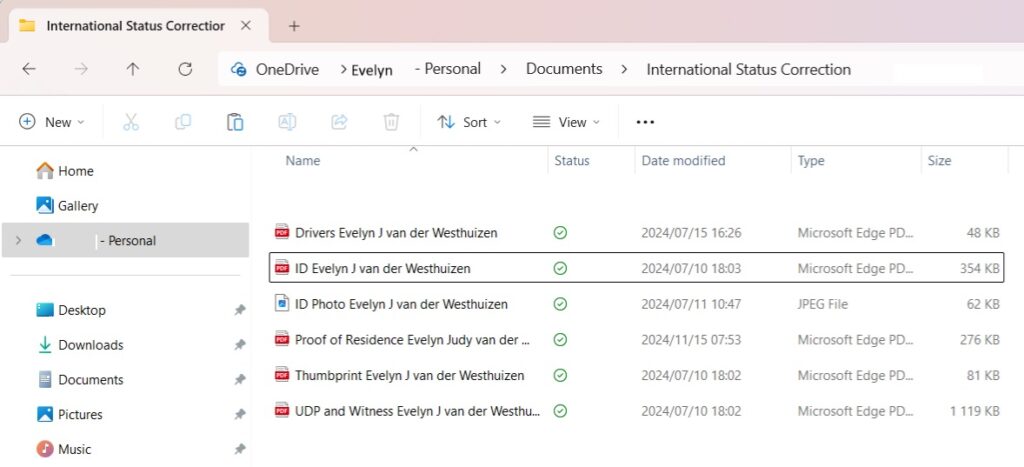
Save the following documents in a folder you create on your computer/phone. Save each file using the following descriptions and format as prescribed. See the example below for our fictitious individual:
- Proof of Residence: your name
- ID: your name OR Drivers: your name OR Passport: your name
- UDP and Witness: your name – IMPORTANT: The declaration form and both witness statement forms must be scanned together into one PDF document.
- Thumbprint: your name
- ID Photo: your name
Example:
Step 3:
There are two ways you can create a digital ID photo:
1.Scan your passport photo when scanning your other documents. Then crop the document to the size of the photo and save it in jpeg format.
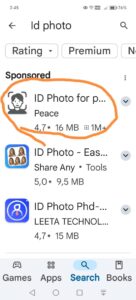
2. Download an ID photo app on your phone to create a digital passport photo in the correct size. We suggest using the following app, then follow the steps below to produce the correct size passport photo as required by GFG:
a) Open the app on your phone.
b) Click on Camera.
c) Click on Custom.
d) Set the photo size: 51mm x 51mm.
e) Take a selfie.
f) Click on Edit Photo.
g) Click on Select Background.
h) Click on Create ID Photo.
i) Finally, click on Save ID Photo.
Email the photo to yourself, download it, and save it in the folder as ID Photo: your name (only JPEG format is accepted).
All other documents must be saved in PDF format.
Step 4:
Open the second email from Global titled “Upload Documents”.
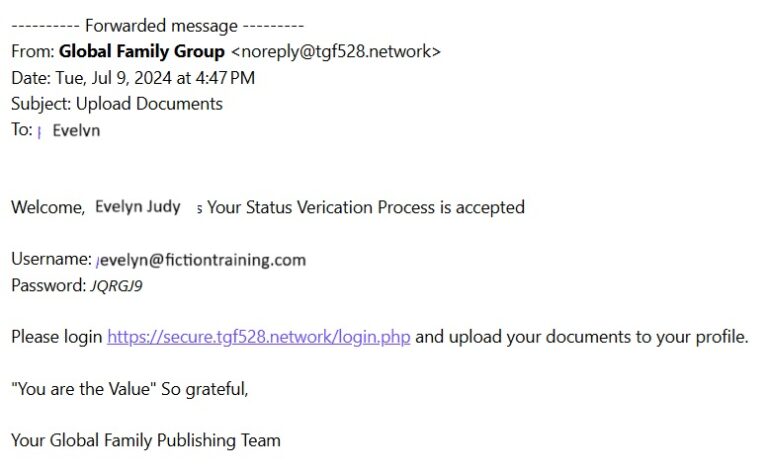
Log in by clicking the link and using the Username and Password provided in the email.
Note that the password provided will work ONLY ONCE, so you MUST change it immediately.
Create a new password and write it down.
IMPORTANT 📌
The first thing you do after logging in is:
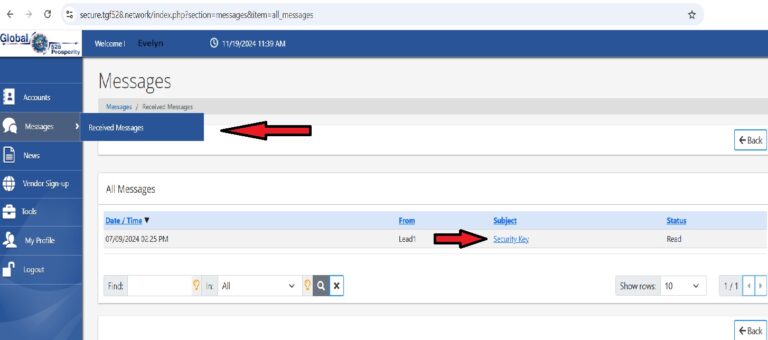
- Click on Messages -> Received Messages, and write down the security key. You will not see this code again, and it is the code you will use for future transactions. This is like your ATM pin code. Without it, you cannot perform any transactions.
Step 5:
Ensure all information under Profile is correct – note that you will not have a GFG Recording Number yet. The system will allocate this to you later, once your documentation is verified.
Click on Documents and start uploading the documents from your folder one by one.
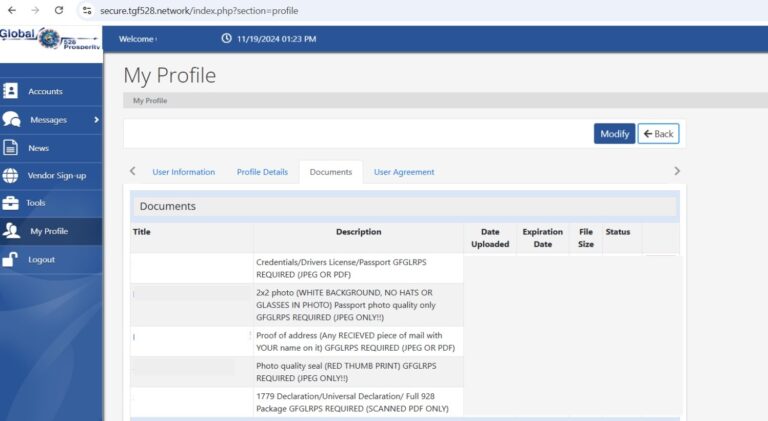
There are additional documents that Americans must include. You only need to ensure that everything in your folder is uploaded.
Check back on the Documents page regularly to ensure all your documentation has been accepted. If not, correct the document as requested and re-upload it.
Your account will not be activated unless all documentation is correct.
When you log out, there is a “Click here to learn More” link. Click the link and go through all the information over time.
Step 6:
Once GFG has allocated you a Recording Number, you must provide this information to TSASA. Simply follow this link and complete the form online: https://tsasa.africa/recording-office/
Examples on how to correctly complete the documents (fictional info)
DOWNLOAD THE FORMS HERE:
Click on the link to get the documents in a downloadable format:
Universal Public Declaration of Political Status (UDP) Form: UDP Form
Witness Testimony Affirming Political Status and Identity Form: Witness Form